


Hello fellow developers, in this blog I am going through the steps on how to integrate Firebase Authentication with a React Native CLI app (not Expo). React Native is a cross-platform mobile application development framework that provides you with an easy syntax like you are writing HTML. It is very easy to use if you're coming from website development.
Note: The whole configuration is for making Android Applications using Windows Operating System so the below configurations might require some additional changes according to the other platforms.
Things require before start
Java (JDK 11 or above)
npm or yarn
Android Studio
Default React Native Project
Firebase Configuration 🔥
Go to Google Firebase and create a new project:

After making the new app, press the android button.

After clicking the android icon, fill in the details and press next. Note: every field is compulsory to fill for better integration.
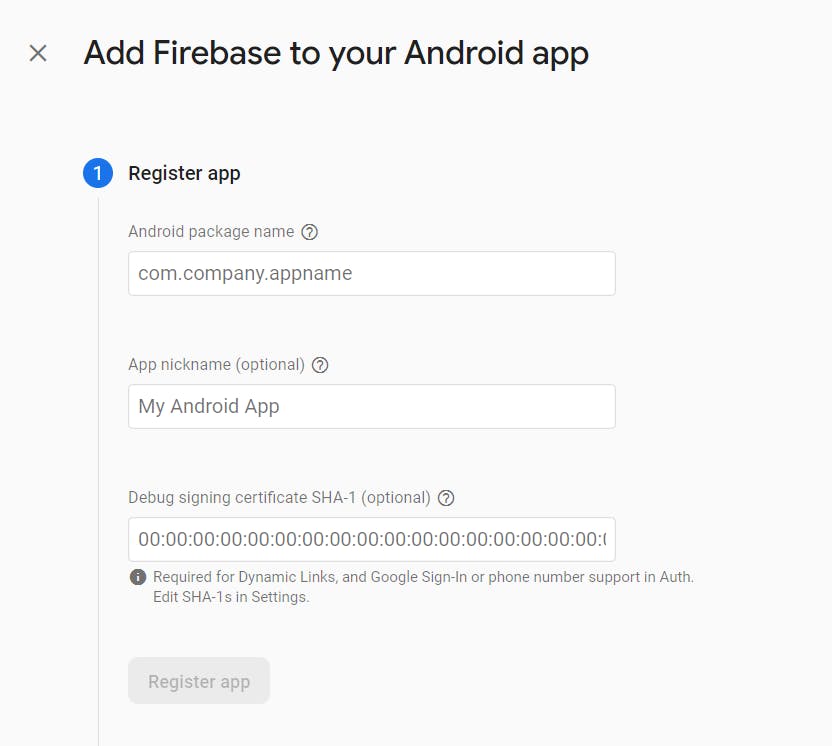
To get the package name, go to /android/app/src/main/AndroidManifest.xml and copy the package name. Then give it any nickname of your choice. Don't forget to give it a debug signing certificate SHA-1. To generate that, go android/app through the terminal and paste the following command to get the key:
cd android/app
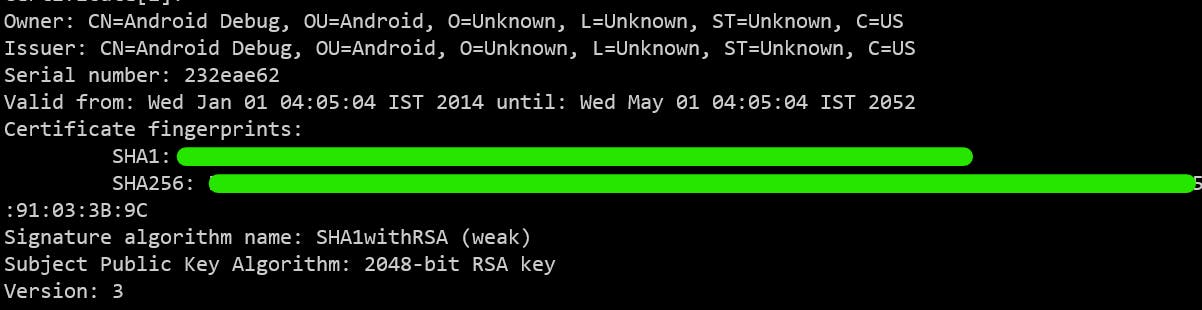
keytool -list -v -alias androiddebugkey -keystore debug.keystore
If it asks for the password, the password will be android as it is the default password. After that you will get your SHA-1 code:
After that, don't do anything. Just press until the prompt disappears. Now press on the authentication tab from the build category of the sidebar and click on get started.
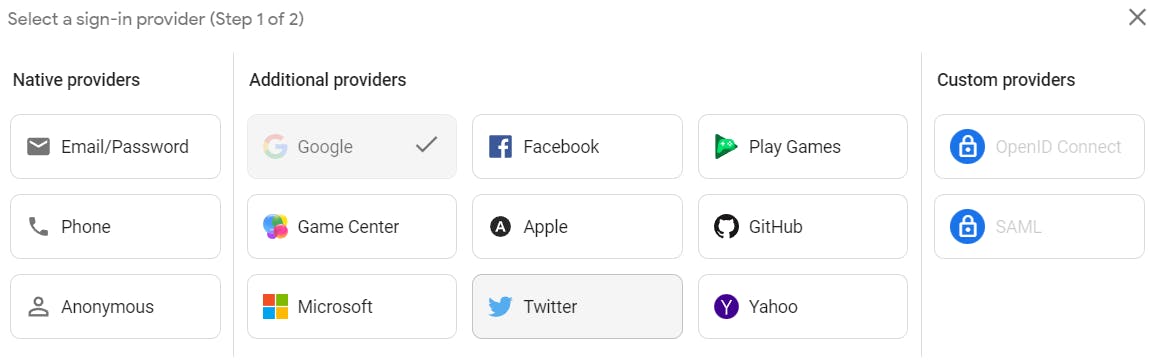
Click on the Sign-in method tab and choose the Google service provider. enable it and save and wait for a few minutes to enable this service.
After adding the Google Service, go to the settings from the Project overview and scroll down for the google service. Now click on the google-services.json button and download that.
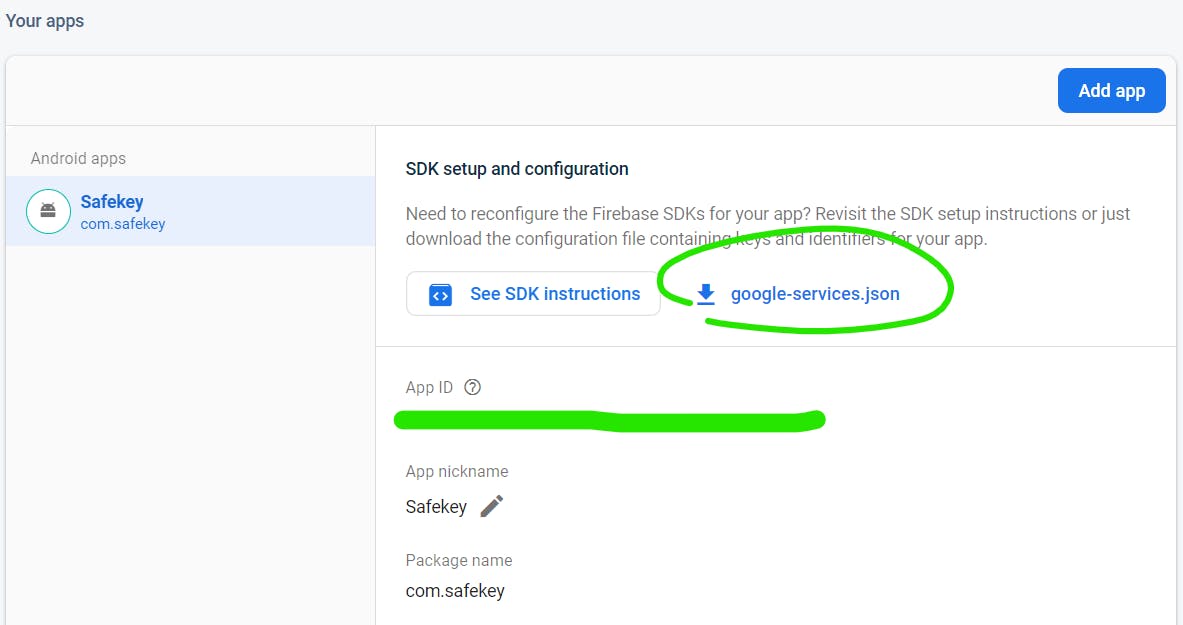
Save this to /android/app a folder.
Projection Configuration 📓
Now install this package to enable the services for Google Sign-in:
# using npm
npm i @react-native-google-signin/google-signin

# using yarn
yarn add @react-native-google-signin/google-signin
After installing, go to the /android/build.gradle file and add the classpath connection string that you've downloaded in the dependencies block:
dependencies {
    ...
    classpath 'com.google.gms:google-services:4.3.15'
    ...
}
After adding the above code, open /android/app/build.grade and go to the end of the file and paste this code:
apply plugin: 'com.google.gms.google-services'
After this, the configuration of firebase is complete, now let's start with the implementation of the code.
Firebase integration with React Native 📝
Before starting the implementation, close your existing server and rebuild the project using the command:
npx react-native run-android
So now import the GoogleSignin and status code from @react-native-google-signin/google-signin in the App.js file and create a Button using Touchable Opacity. Also, give some styling to make it better. Now in the onPress event, pass a function that will authenticate using Google Signin.
import {
  StyleSheet,
  Text,
  View,
  Alert,
  TouchableOpacity,
} from 'react-native';
import React, {useEffect} from 'react';
import {
  GoogleSignin,
  statusCodes,
} from '@react-native-google-signin/google-signin';

export default function App() {
    useEffect(() => {
        GoogleSignin.config();
    }, []);


    const googleSignin = async () => {
        try {
          await GoogleSignin.hasPlayServices();
          const userInfo = await GoogleSignin.signIn();
          console.log(JSON.stringify(userInfo, null, 2));

        } catch (error: any) {
          if (error.code === statusCodes.SIGN_IN_CANCELLED) {
            // user cancelled the login flow
            Alert.alert('Error Occured');
          } else if (error.code === statusCodes.IN_PROGRESS) {
            // operation (e.g. sign in) is in progress already
            Alert.alert('Error Occured');
          } else if (error.code === statusCodes.PLAY_SERVICES_NOT_AVAILABLE) {
            // play services not available or outdated
            Alert.alert('Error Occured');
          } else {
            // some other error happened
           Alert.alert('Error Occured');
          }
        }
  };

    return (
        <View style={styles.container}>
          <TouchableOpacity
            style={styles.buttonDesign}
            activeOpacity={0.8}
            onPress={googleSignin}
          >
            <Text style={styles.text}>Signin with Google</Text>
          </TouchableOpacity>
        </View>
    );
}

const styles = StyleSheet.create({
  container: {
    flex: 1,
    alignItems: 'center',
    justifyContent: 'center',
  },
  buttonDesign: {
    paddingHorizontal: 40,
    paddingVertical: 15,
    borderWidth: 2,
    borderRadius: 100,
    flexDirection: 'row',
    alignItems: 'center',
  },
  text: {
    color: '#fff',
    fontSize: 18,
    marginLeft: 10,
  },
});
With that, your configuration + implementation is complete. Now you can start authenticating the app using your Gmail IDs with react native.
Thank you! for reading, please leave your comments if any ✌️
Don't forget to bookmark this blog for the future 📌
Connect with the author: